
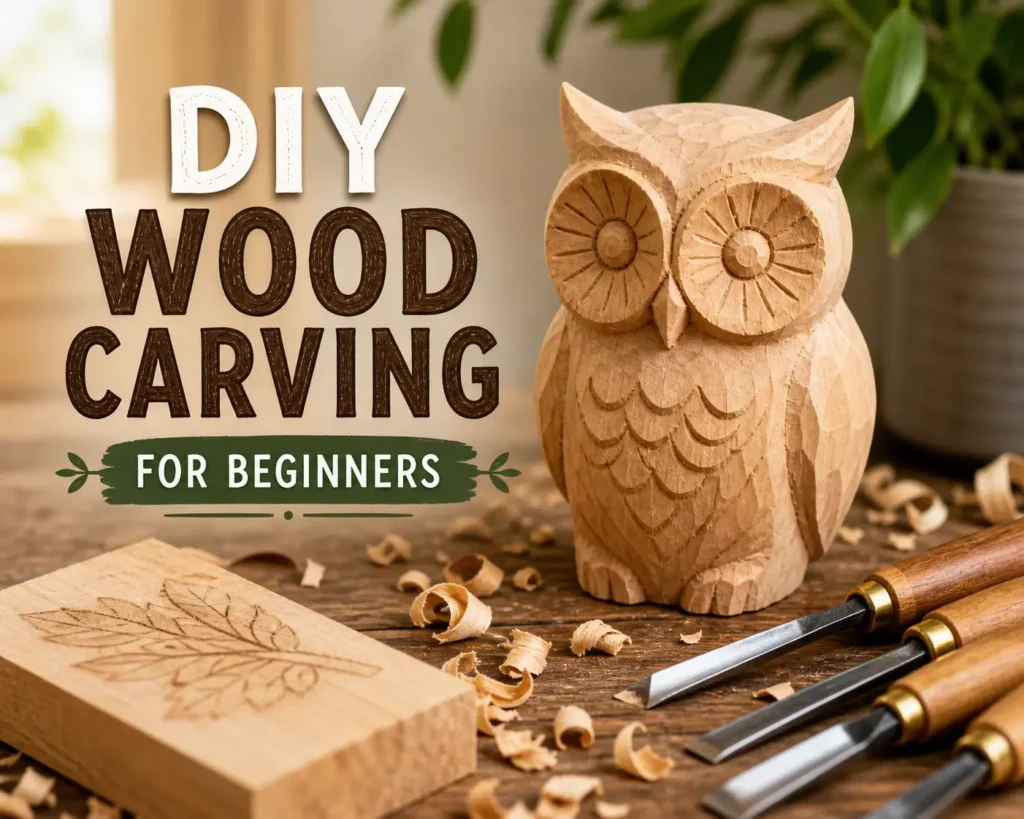
There’s something magical about picking up a piece of raw wood and turning it into something beautiful with your own two hands. I still remember my first carving – a lopsided spoon that I was embarrassingly proud of. That humble start led me to a lifelong career as a wood sculptor.
If you’ve ever wanted to try wood carving but felt intimidated, this guide is for you. I’ll walk you through the tools, safety basics, simple techniques, and an easy first project. No fancy workshop required.
Why Wood Carving?

Wood carving is one of the most accessible forms of sculpture. The material is forgiving, the tools are relatively inexpensive, and the satisfaction of creating something tangible is immediate. Plus, hand‑carved pieces add warmth and personality to any home – and they make incredible gifts.
What You’ll Need (The Beginner’s Toolkit)

You don’t need a professional studio. Start with these essentials:
| Tool | Purpose | Approx. Cost |
|---|---|---|
| Carving knife (fixed blade, e.g., Morakniv 120) | General shaping and whittling | $25–40 |
| Sloyd knife | Controlled cuts and detail work | $30–50 |
| Cut‑resistant gloves | Protect your non‑knife hand | $10–15 |
| Leather thumb guard | Extra protection for your pushing thumb | $5–10 |
| Basswood blocks (soft, straight grain) | Best wood for beginners | $10–20 for a pack |
| Strop + honing compound | Keep your knife razor‑sharp | $15–25 |
| Pencil & paper | Sketch your design first | Free |
Pro tip: Don’t buy a 20‑piece set. Start with one good carving knife and learn to keep it sharp.
Safety First: Carve Smart, Not Sorry
Wood carving is relaxing – but a dull knife or a distracted moment can send you to the ER. Here’s how to stay safe:
- Always wear a cut‑resistant glove on the hand holding the wood.
- Keep your knife sharp. A sharp knife is actually safer because it requires less force and won’t slip unpredictably.
- Carve away from your body. Never pull the blade toward your chest or other hand.
- Secure your work. Use a non‑slip mat or clamp if needed.
- Take breaks. Fatigue leads to mistakes. Put the knife down when your hands get tired.
For a complete checklist, see our [Sculptor’s Safety Guide]
3 Basic Cuts Every Beginner Should Master
Before carving a masterpiece, practice these three fundamental cuts on a scrap piece of basswood.
1. The Push Cut (Straight cut)
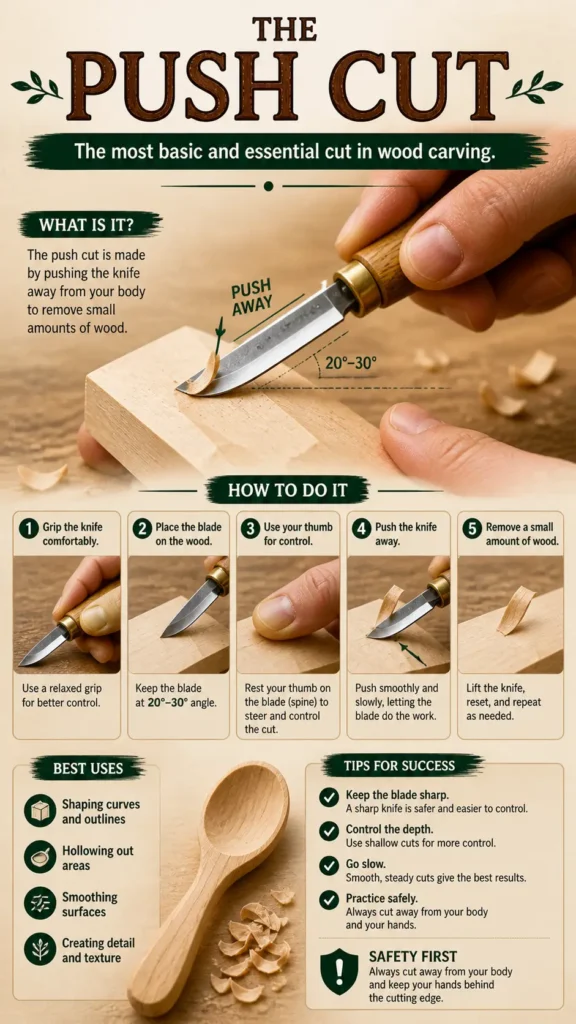
Hold the knife firmly, place the blade at a shallow angle (about 30°), and push forward with your thumb. Great for roughing out shapes.
2. The Pull Cut (Whittling cut)
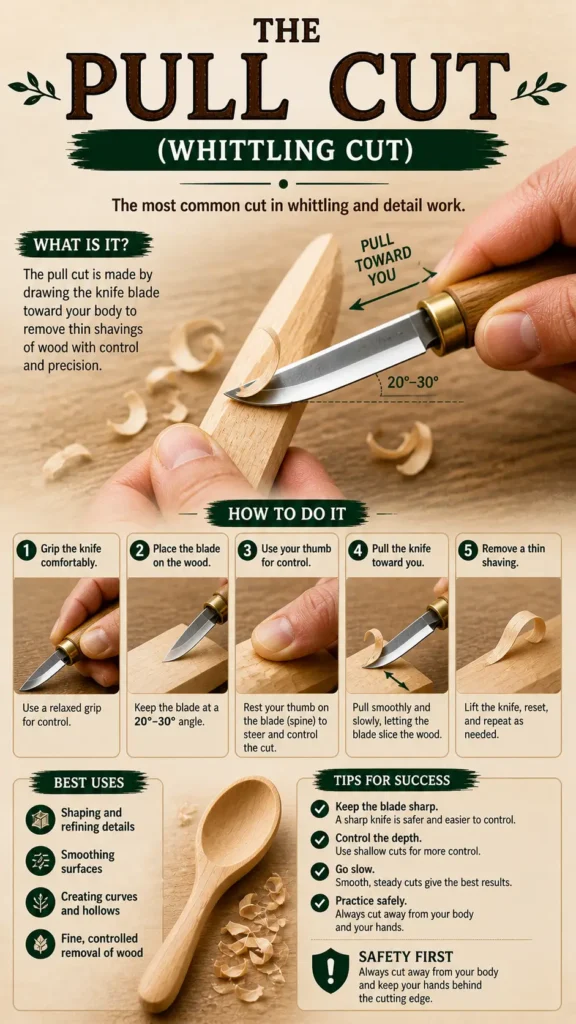
Hold the wood in your gloved hand. Pull the knife toward you (but not toward your body) using your thumb as a lever. Used for removing thin slices.
3. The V‑Cut (For lines and details)
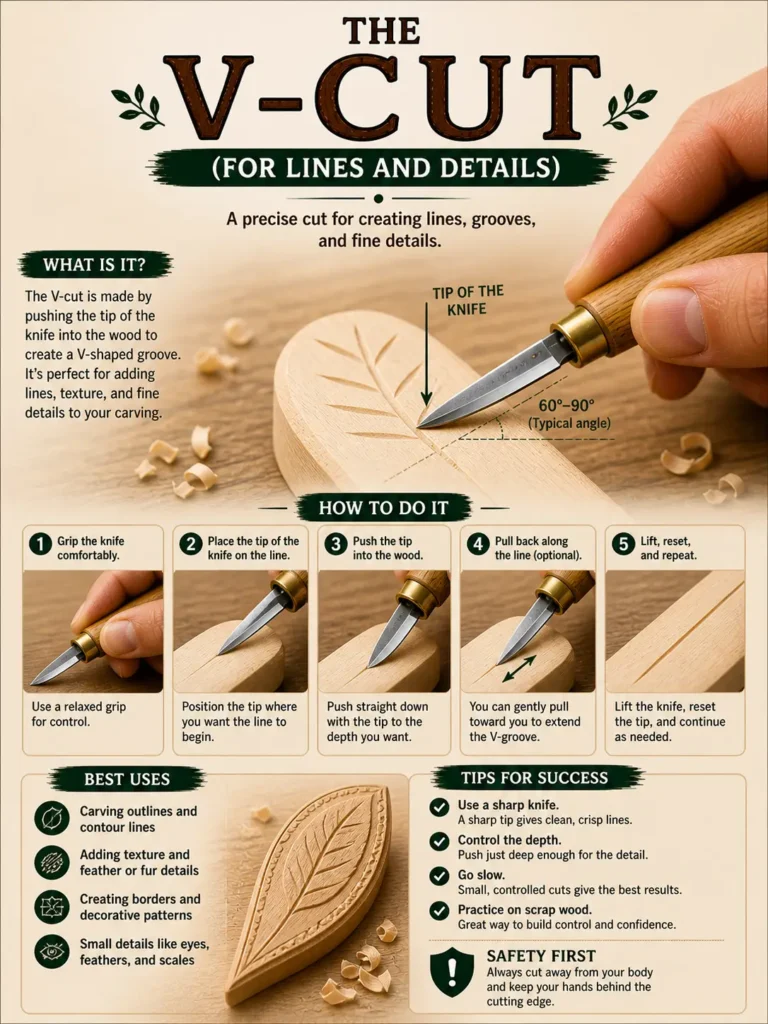
Make two angled cuts meeting at the bottom to form a V‑shaped groove. Perfect for texture, feathers, or lettering.
Your First Project: A Simple Wooden Spoon
A wooden spoon is the perfect beginner project. It teaches you shaping, hollowing, and finishing – and you’ll actually use it.
Materials:
- Basswood block: 2” x 2” x 6”
- Carving knife
- Spoon gouge (optional, but helpful for the bowl)
- Sandpaper (120, 220, 400 grit)
- Food‑safe mineral oil or beeswax
Steps:
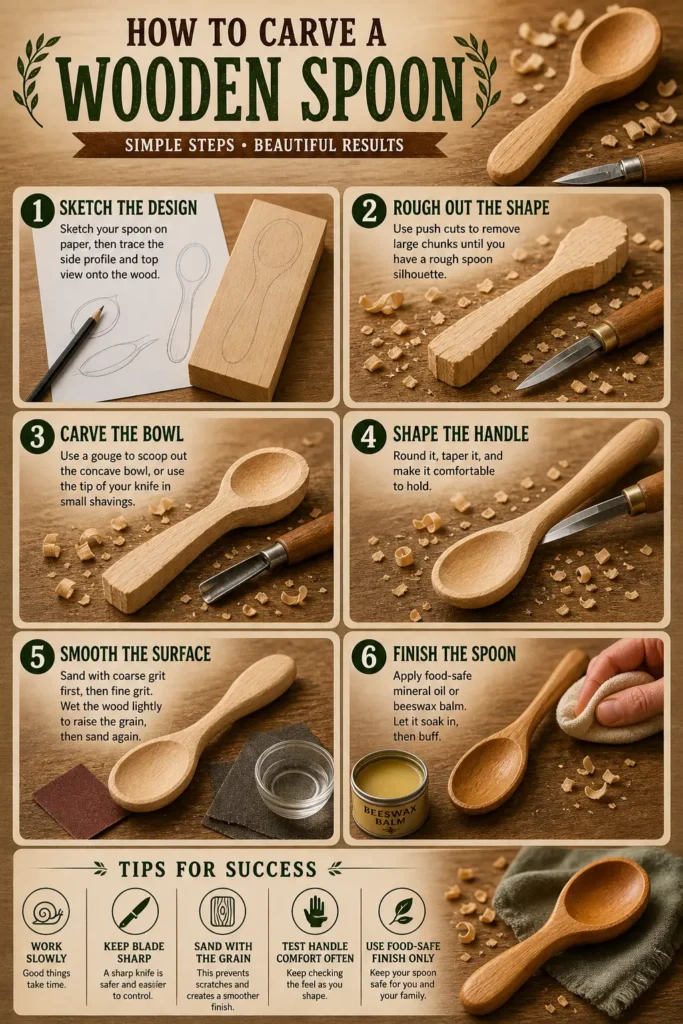
- Sketch your spoon on paper, then trace the side profile and top view onto the wood.
- Rough out the shape using push cuts. Remove the big chunks until you have a rough spoon silhouette.
- Carve the bowl (if you have a gouge, scoop out the concave area; if not, use the tip of your knife in small shavings).
- Shape the handle – round it, taper it, make it comfortable to hold.
- Smooth with sandpaper – start coarse, end fine. Wet the wood lightly to raise the grain, then sand again.
- Finish with food‑safe mineral oil or a beeswax balm. Let it soak in, then buff.
That spoon will remind you every day: I made this.
You Might Like : 7 Simple Steps to Sculpt Your First Piece
Common Mistakes (And How to Avoid Them)
| Mistake | Fix |
|---|---|
| Cutting too deep at once | Take thin shavings. You can always remove more wood, but you can’t put it back. |
| Dull knife | Strop every 15–20 minutes of carving. |
| Carving against the grain | Learn to read the wood grain. Carve in the direction it flows. |
| Skipping the sketch | A 2‑minute drawing saves 20 minutes of fixing mistakes. |
Where to Go From Here
Once you’ve carved your first spoon, try:
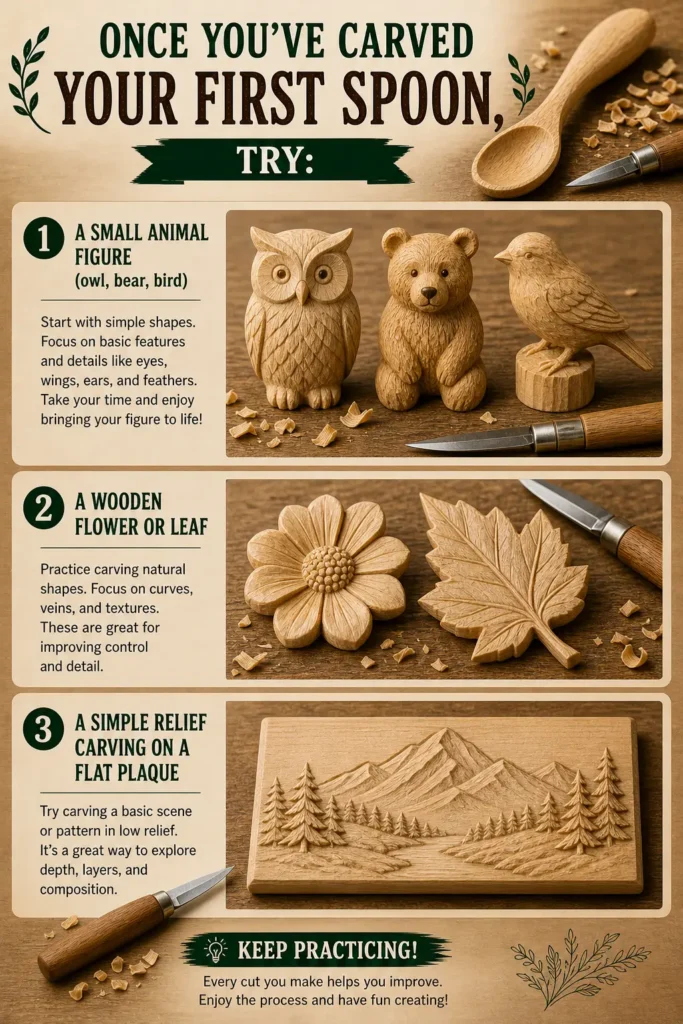
- A small animal figure (owl, bear, bird)
- A wooden flower or leaf
- A simple relief carving on a flat plaque
And when you’re ready, explore sculptural wood wall art – my specialty. Flowing, organic forms that turn a blank wall into a gallery.
Table of Contents
Final Thoughts from Sheila
Wood carving taught me patience, humility, and the joy of slow making. Your first piece won’t be perfect – mine wasn’t. But the second will be better, and the third even more so. The grain will guide you if you let it.
If you have questions or want to share your first carving, email me at hello@woodzaa.com. I’d love to see what you create.

Pingback: The Most Breathtaking Wood Sculpture Art of the Year: 10 Wood Sculpture Ideas That Are Pure Genius - Woodzaa