
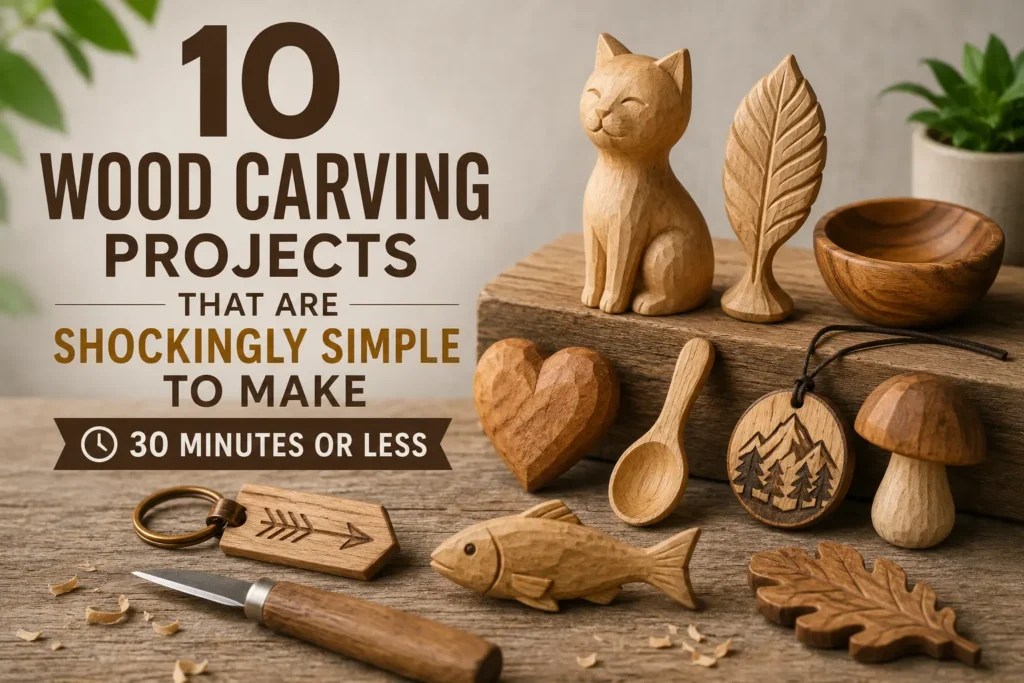

You want to make something beautiful from wood. But every tutorial you see requires expensive power tools, a garage full of equipment, and hours of complicated work. What if I told you that some of the most stunning wood art can be made in under 30 minutes with just a knife and a scrap of wood?
Let me show you wood carving projects that are shockingly simple to make. In this guide, you’ll discover flat-plane carving for instant results, how to carve a basic wood pendant or tag, master easy wood sign lettering, enjoy no power tools required freedom, create projects from scrap wood or twigs, achieve beautiful results in under 30 minutes, add simple texture with a screwdriver tip, and explore abstract organic shapes (no wrong form).
These projects are so straightforward that even total beginners will finish their first piece before lunch.
1. Flat-Plane Carving for Instant Results – No Rounded Edges

Flat-plane carving for instant results is a technique where you leave every surface flat, like a faceted gem. No rounding, no smoothing. The result looks intentionally modern and architectural – and it’s incredibly forgiving.
How to do it:
- Start with a basswood block (1x1x2 inches).
- Carve a simple shape – a house, a bird, or a Christmas tree – using only straight, flat cuts.
- Leave all surfaces flat. Don’t sand.
- The sharp edges catch light beautifully.
Why it works:
Flat-plane carving hides wobbles because the human eye reads faceted surfaces as “stylised,” not “mistake.” You’ll finish in 20 minutes.
Worthy tip: “Use a very sharp knife and cut in one continuous motion. Flat planes look crispest when each face is cut with a single pass.”
For more easy ideas, check out our related article: Wood Carving Projects That Are Shockingly Simple to Make (Mid to High Net Worth)
You Might Like : Do You Want Custom Wood Sculpture Click This…
2. Basic Wood Pendant or Tag – Wearable Art in 15 Minutes
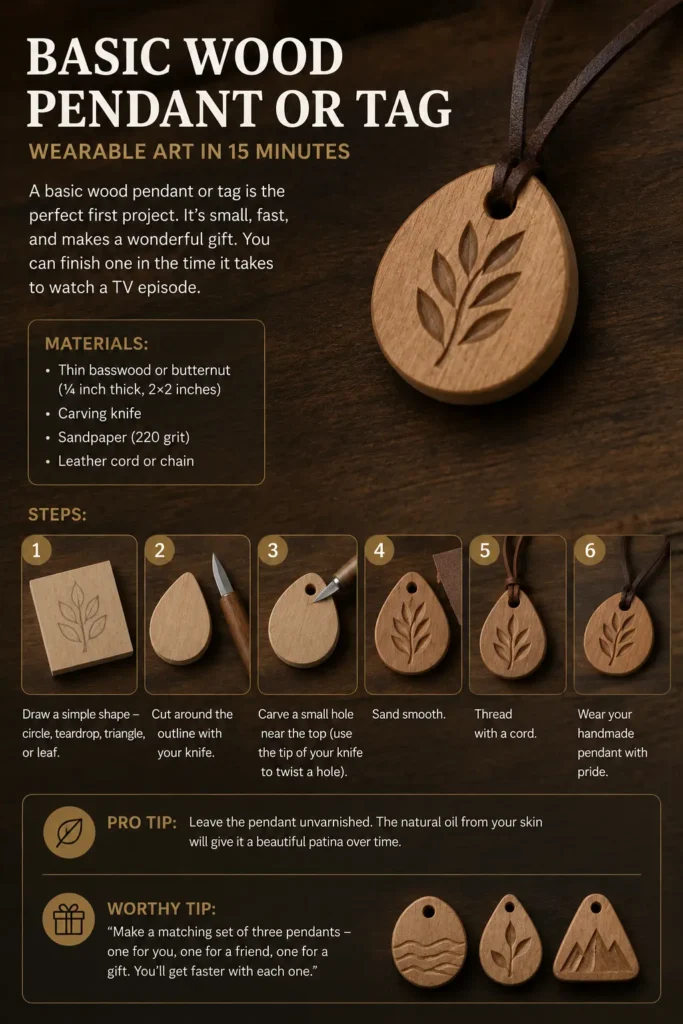
A basic wood pendant or tag is the perfect first project. It’s small, fast, and makes a wonderful gift. You can finish one in the time it takes to watch a TV episode.
Materials:
- Thin basswood or butternut (¼ inch thick, 2×2 inches)
- Carving knife
- Sandpaper (220 grit)
- Leather cord or chain
Steps:
- Draw a simple shape – circle, teardrop, triangle, or leaf.
- Cut around the outline with your knife.
- Carve a small hole near the top (use the tip of your knife to twist a hole).
- Sand smooth.
- Thread with a cord.
Pro tip:
Leave the pendant unvarnished. The natural oil from your skin will give it a beautiful patina over time.
Worthy tip: “Make a matching set of three pendants – one for you, one for a friend, one for a gift. You’ll get faster with each one.”
3. Easy Wood Sign Lettering – No Fancy Tools Required
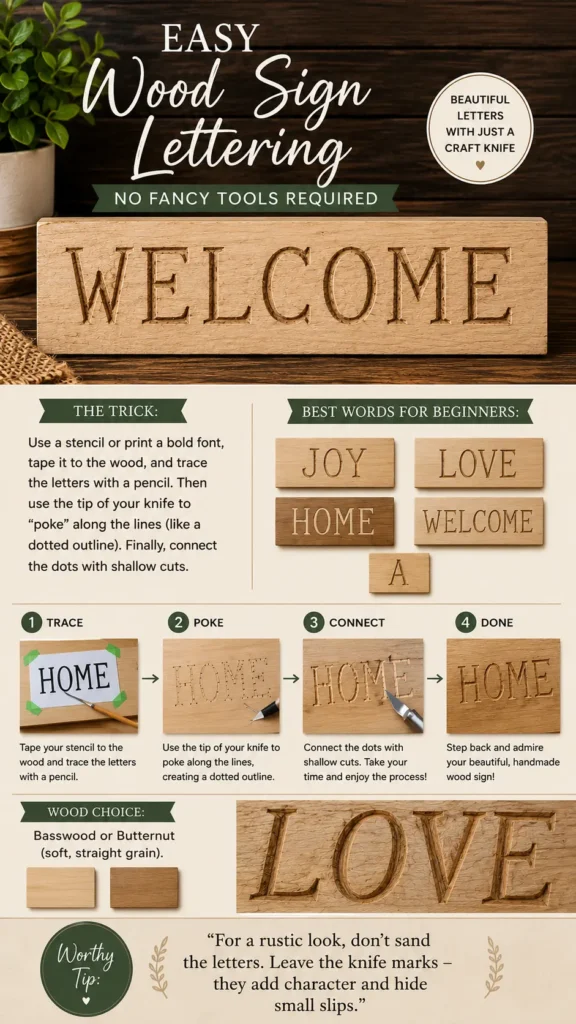
Easy wood sign lettering sounds intimidating, but with a simple trick, you can carve beautiful letters using only a craft knife.
The trick:
Use a stencil or print a bold font, tape it to the wood, and trace the letters with a pencil. Then use the tip of your knife to “poke” along the lines (like a dotted outline). Finally, connect the dots with shallow cuts.
Best words for beginners:
JOY, LOVE, HOME, WELCOME, or a single initial.
Wood choice:
Basswood or butternut (soft, straight grain).
Worthy tip: “For a rustic look, don’t sand the letters. Leave the knife marks – they add character and hide small slips.”
4. No Power Tools Required – Just a Knife and Sandpaper
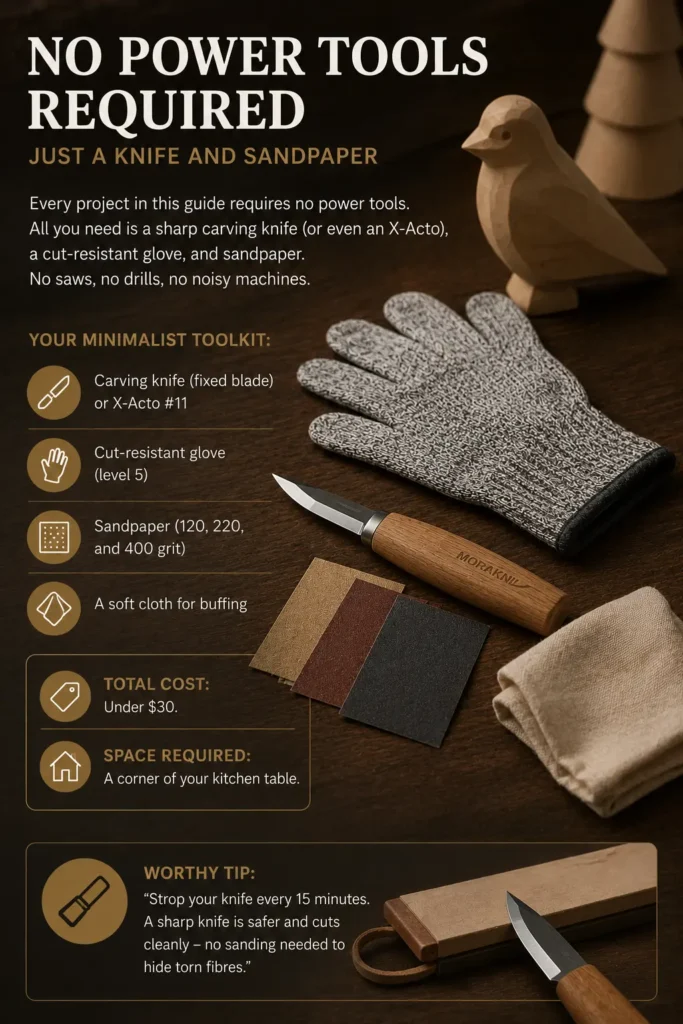
Every project in this guide requires no power tools required. All you need is a sharp carving knife (or even an X‑Acto), a cut‑resistant glove, and sandpaper. No saws, no drills, no noisy machines.
Your minimalist toolkit:
- Carving knife (fixed blade) or X‑Acto #11
- Cut‑resistant glove (level 5)
- Sandpaper (120, 220, and 400 grit)
- A soft cloth for buffing
Total cost: Under $30.
Space required: A corner of your kitchen table.
Worthy tip: “Strop your knife every 15 minutes. A sharp knife is safer and cuts cleanly – no sanding needed to hide torn fibres.”
5. Projects from Scrap Wood or Twigs – Free Materials
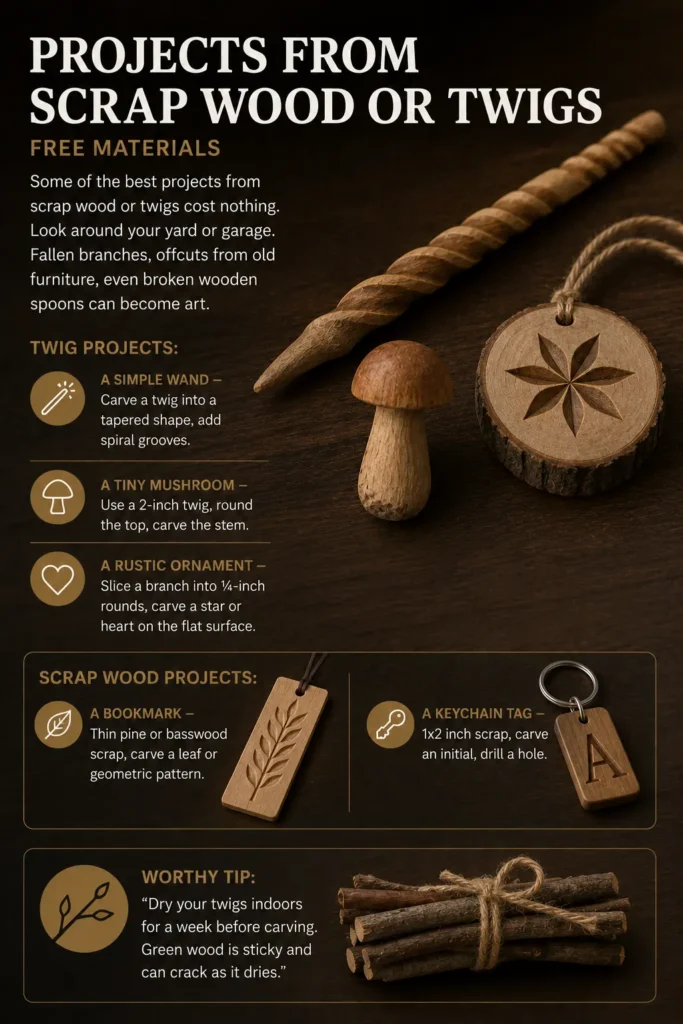
Some of the best projects from scrap wood or twigs cost nothing. Look around your yard or garage. Fallen branches, offcuts from old furniture, even broken wooden spoons can become art.
Twig projects:
- A simple wand – Carve a twig into a tapered shape, add spiral grooves.
- A tiny mushroom – Use a 2‑inch twig, round the top, and carve the stem.
- A rustic ornament – Slice a branch into ¼‑inch rounds, carve a star or heart on the flat surface.
Scrap wood projects:
- A bookmark – Thin pine or basswood scrap, carve a leaf or geometric pattern.
- A keychain tag – 1×2 inch scrap, carve an initial, drill a hole.
Worthy tip: “Dry your twigs indoors for a week before carving. Green wood is sticky and can crack as it dries.”
6. Beautiful Results in Under 30 Minutes – Speed Projects
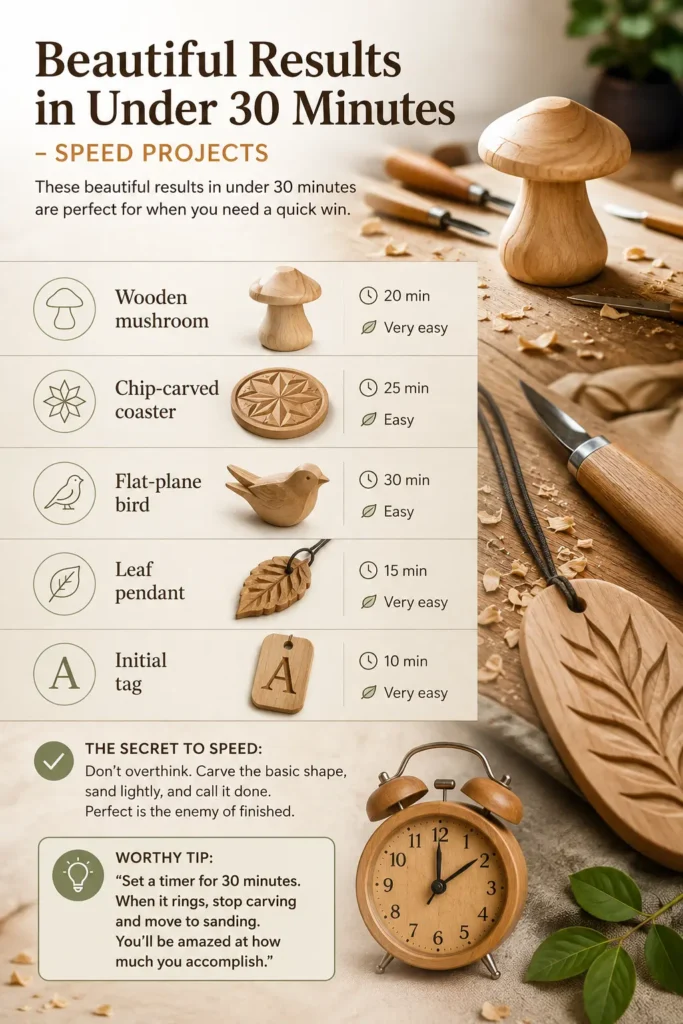
These beautiful results in under 30 minutes are perfect for when you need a quick win.
| Project | Time | Difficulty |
|---|---|---|
| Wooden mushroom | 20 min | Very easy |
| Chip‑carved coaster | 25 min | Easy |
| Flat‑plane bird | 30 min | Easy |
| Leaf pendant | 15 min | Very easy |
| Initial tag | 10 min | Very easy |
The secret to speed:
Don’t overthink. Carve the basic shape, sand lightly, and call it done. Perfect is the enemy of finished.
Worthy tip: “Set a timer for 30 minutes. When it rings, stop carving and move to sanding. You’ll be amazed at how much you accomplish.”
7. Simple Texture with a Screwdriver Tip – No Special Tools
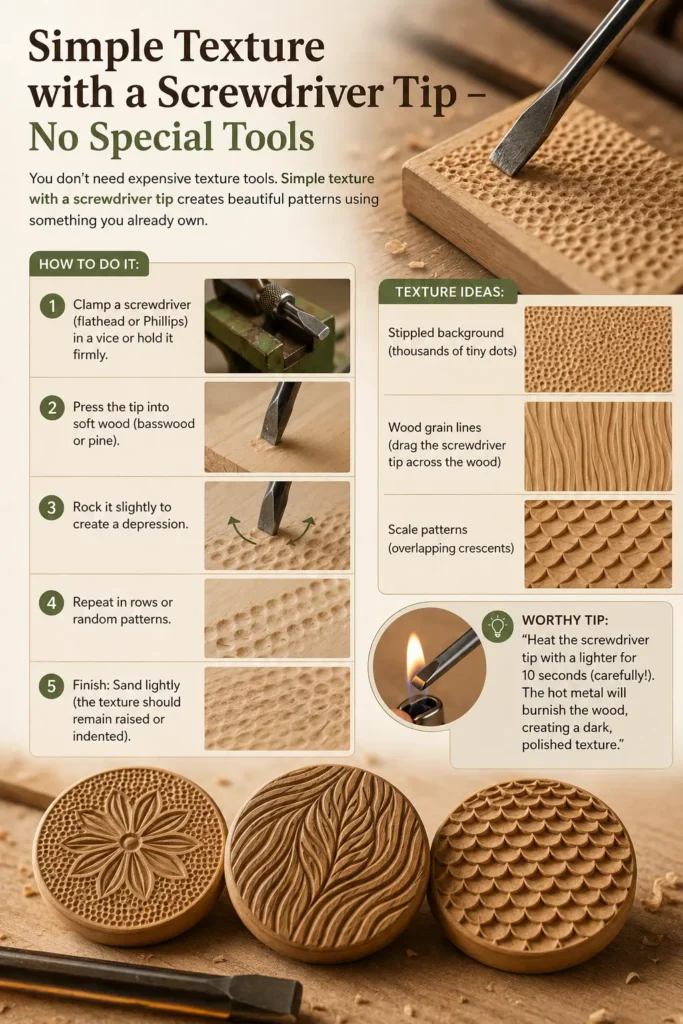
You don’t need expensive texture tools. Simple texture with a screwdriver tip creates beautiful patterns using something you already own.
How to do it:
- Clamp a screwdriver (flathead or Phillips) in a vice or hold it firmly.
- Press the tip into soft wood (basswood or pine).
- Rock it slightly to create a depression.
- Repeat in rows or random patterns.
Texture ideas:
- Stippled background (thousands of tiny dots)
- Wood grain lines (drag the screwdriver tip across the wood)
- Scale patterns (overlapping crescents)
Finish: Sand lightly (the texture should remain raised or indented).
Worthy tip: “Heat the screwdriver tip with a lighter for 10 seconds (carefully!). The hot metal will burnish the wood, creating a dark, polished texture.”
8. Abstract Organic Shapes (No Wrong Form) – Zero Pressure

Abstract organic shapes (no wrong form) are the ultimate stress‑free carving. There’s no template, no right or wrong. You just remove wood until the shape pleases you.
How to start:
- Hold a small basswood block (2×2×1 inch).
- Make random cuts – round a corner, scoop a hollow, carve a groove.
- Turn the block constantly.
- Stop when it feels good in your hand or looks interesting on a shelf.
Why it works:
Abstract pieces look like intentional modern sculpture. No one knows what it was “supposed” to be – so they assume you’re a genius.
Worthy tip: “Name your abstract piece after you finish – ‘River Stone,’ ‘Dragon’s Tooth,’ ‘Morning Cloud.’ The name tells viewers what to see.”
Bonus: Your First 30‑Minute Project – A Twig Mushroom
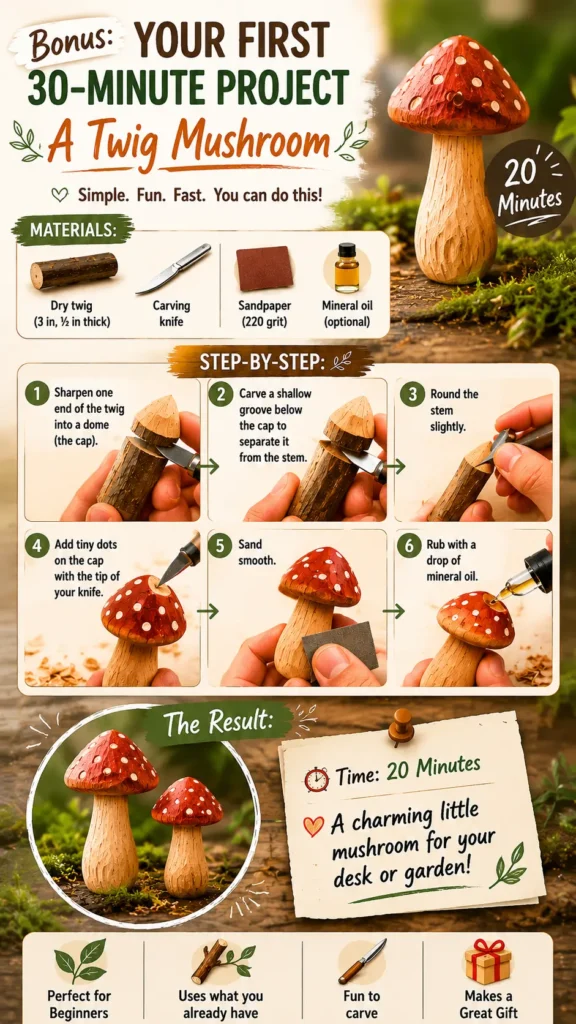
Materials:
- A dry twig (about 3 inches long, ½ inch thick)
- Carving knife
- Sandpaper (220 grit)
- Mineral oil (optional)
Steps:
- Sharpen one end of the twig into a dome (the cap).
- Carve a shallow groove below the cap to separate it from the stem.
- Round the stem slightly.
- Add tiny dots on the cap with the tip of your knife.
- Sand smooth.
- Rub with a drop of mineral oil.
Time: 20 minutes.
Result: A charming little mushroom for your desk or garden.
From Shockingly Simple to Proudly Handmade
You now have wood carving projects that are shockingly simple to make – from flat-plane carving for instant results and basic wood pendant or tag to easy wood sign lettering, no power tools required, projects from scrap wood or twigs, beautiful results in under 30 minutes, simple texture with a screwdriver tip, and abstract organic shapes (no wrong form).
The hardest part is starting. Pick one project. Find a scrap of wood. Make that first cut. I promise you’ll be hooked.
Table of Contents
Call to Action (CTA)
Tried one of these shockingly simple projects? I’d love to see. Email a photo to admin@woodzaa.com with “Simple Carve” in the subject line. I’ll send you a free PDF of 10 more easy patterns – and I might feature your work on my Pinterest.
Now go make something beautiful in under 30 minutes.
– Sheila


Pingback: Start Whittling Today: Simple Whittling Ideas That Create Beautiful Results – 12 Projects You’ll Be Proud to Display - Woodzaa