


You see those beautiful hand‑carved wooden pieces on Pinterest – the spoons, the little animals, the decorative wall art – and you think, “I could never make that.” But what if you could? What if, instead of years of practice, you just needed five simple steps?
Let me walk you through beginner wood carving art: from zero to stunning in 5 steps. No experience? Perfect. I designed this for no-experience wood carving enthusiasts who want professional‑looking results fast. You’ll learn step one: choosing beginner wood, setting up a beginner work area, understanding wood grain for first cut, how to achieve professional‑looking results fast with high-impact low-skill designs, the magic of sanding progression (120 to 400 grit), and why basswood carving blocks are your new best friend.
Ready? Let’s turn a block of wood into something you’ll be proud to display.
Step 1: Choosing Beginner Wood – Start With Basswood
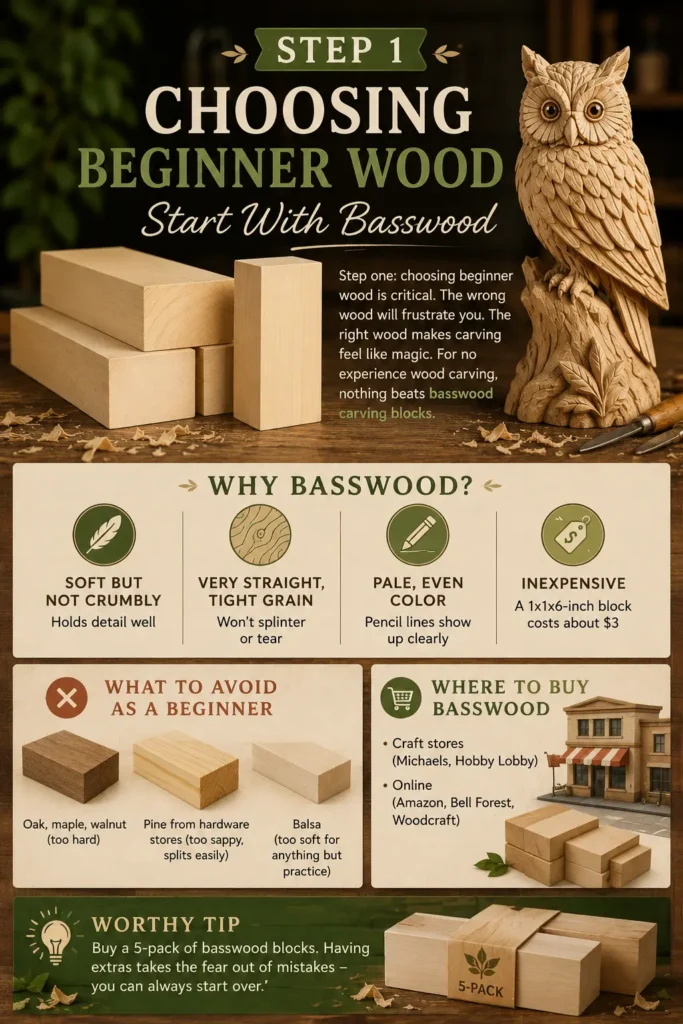
Step one: choosing beginner wood is critical. The wrong wood will frustrate you. The right wood makes carving feel like magic. For no experience wood carving, nothing beats basswood carving blocks.
Why basswood?
- Soft but not crumbly (holds detail well)
- Very straight, tight grain (won’t splinter or tear)
- Pale, even color (pencil lines show up clearly)
- Inexpensive (a 1x1x6-inch block costs about $3)
What to avoid as a beginner:
Oak, maple, walnut (too hard). Pine from hardware stores (too sappy, splits easily). Balsa (too soft for anything but practice).
Where to buy basswood:
Craft stores (Michaels, Hobby Lobby), online (Amazon, Bell Forest, Woodcraft).
Worthy tip: “Buy a 5‑pack of basswood blocks. Having extras takes the fear out of mistakes – you can always start over.”
For more guidance on materials, check out our related article: Beginner Wood Carving Art: From Zero to Stunning in 5 Steps (Mid to High Net Worth)
Step 2: Setting Up a Beginner Work Area – Comfort and Safety

You don’t need a fancy workshop. Setting up a beginner work area takes 10 minutes and costs almost nothing.
What you need:
- A sturdy table or desk (kitchen table works fine)
- Good lighting (a desk lamp aimed at your hands)
- A non‑slip mat or a piece of drawer liner (keeps wood from sliding)
- A small container for wood shavings (a cardboard box works)
- A comfortable chair with armrests (elbows at 90°)
Safety essentials at your station:
- Cut‑resistant glove (always wear it on your holding hand)
- First‑aid kit nearby (just in case)
- Phone or timer (take a break every 45 minutes to avoid fatigue)
Worthy tip: “Place a damp paper towel in your shavings container. It keeps dust from flying around your workspace.”
You Might Like : Do You Want Custom Wood Sculpture Click This…
Step 3: Understanding Wood Grain for First Cut – Read the Tree
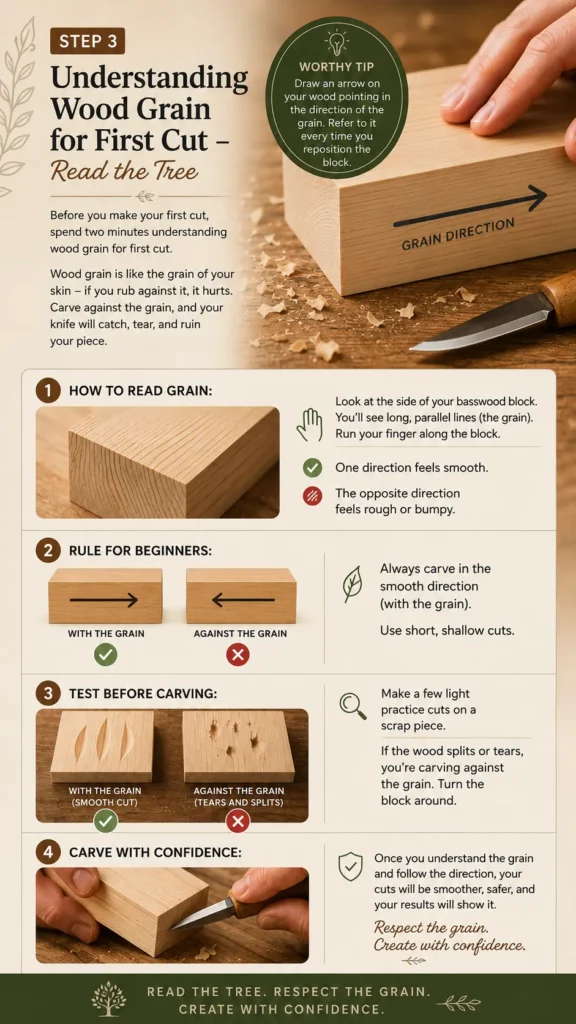
Before you make your first cut, spend two minutes understanding wood grain for first cut. Wood grain is like the grain of your skin – if you rub against it, it hurts. Carve against the grain, and your knife will catch, tear, and ruin your piece.
How to read grain:
Look at the side of your basswood block. You’ll see long, parallel lines (the grain). Run your finger along the block. One direction feels smooth. The opposite direction feels rough or bumpy.
Rule for beginners:
Always carve in the smooth direction (with the grain). Use short, shallow cuts.
Test before carving:
Make a few light practice cuts on a scrap piece. If the wood splits or tears, you’re carving against the grain. Turn the block around.
Worthy tip: “Draw an arrow on your wood pointing in the direction of the grain. Refer to it every time you reposition the block.”
Step 4: High‑Impact Low‑Skill Designs – Look Like a Pro Immediately
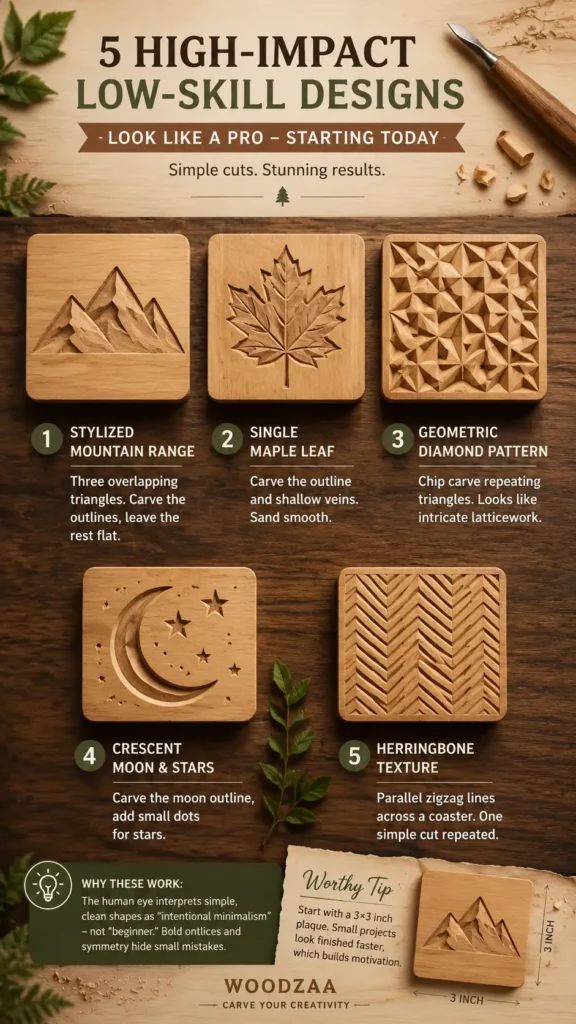
The secret to professional‑looking results fast is choosing high-impact low-skill designs. These are shapes that look impressive but require almost no carving skill.
Top 5 high‑impact designs for beginners:
- A stylized mountain range – Three overlapping triangles. Carve the outlines, leave the rest flat.
- A single maple leaf – Carve the outline and shallow veins. Sand smooth.
- A geometric diamond pattern – Chip carve repeating triangles. Looks like intricate latticework.
- A crescent moon and stars – Carve the moon outline, add small dots for stars.
- A herringbone texture – Parallel zigzag lines across a coaster. One simple cut repeated.
Why these work:
The human eye interprets simple, clean shapes as “intentional minimalism” – not “beginner.” Bold outlines and symmetry hide small mistakes.
Worthy tip: “Start with a 3×3 inch plaque. Small projects look finished faster, which builds motivation.”
Step 5: Sanding Progression (120 to 400 Grit) – The Magic Step

Here’s where beginners become pros: sanding progression (120 to 400 grit). Your carving might be rough, but sanding transforms it into something silky and expensive‑looking.
The progression:
- 120 grit – Removes tool marks and rough edges.
- 220 grit – Smooths the surface, removes scratches from 120.
- 320 grit – Prepares for finishing, feels like velvet.
- 400 grit – Final polish. The wood will glow.
Pro technique – raising the grain:
After 220 grit, lightly dampen the wood with a wet cloth. Let it dry. Sand again with 320. This removes the fuzzy “whiskers” that rise when you apply the finish.
Sanding tools:
- Sandpaper wrapped around a flat block (for flat surfaces)
- Folded sandpaper (for curves and crevices)
- Sanding sticks or foam pads (for small details)
Worthy tip: “Change your sandpaper frequently. Clogged paper scratches instead of sanding. A fresh sheet is cheap; a ruined carving is not.”
Bonus: Your First Complete Project – A Stunning Coaster in 5 Steps

Let’s put it all together with a real project.
Materials:
- One basswood carving block (4×4 inches, ½ inch thick)
- Pencil and paper
- Carving knife (or X‑Acto)
- Cut‑resistant glove
- Sandpaper (120, 220, 320, 400 grit)
- Mineral oil or beeswax
Step 1 – Choose design: A simple mountain range or leaf pattern.
Step 2 – Transfer: Draw directly or use a stencil.
Step 3 – Carve: Follow your lines, carving with the grain. Keep cuts shallow (⅛ inch deep).
Step 4 – Sand: Progress through 120 to 400 grit. Raise the grain after 220.
Step 5 – Finish: Wipe on mineral oil, let soak 10 minutes, buff with a soft cloth.
Time: 2–3 hours.
Result: A professional‑looking coaster that could sit in a design magazine.
Worthy tip: “Make four coasters with different designs. Arrange them on your coffee table – they’ll look like a curated set.”
From Zero to Stunning – You Did It
You now have a complete roadmap for beginner wood carving art: from zero to stunning in 5 steps. You’ve learned step one: choosing beginner wood, setting up a beginner work area, understanding wood grain for first cut, professional‑looking results fast with high-impact low-skill designs, and the magic of sanding progression (120 to 400 grit) using basswood carving blocks.
The only thing left is to make that first cut. Trust me – your first piece will be better than you expect. And your second will be even better.
Table of Contents
Call to Action (CTA)
Ready to go from zero to stunning? Email me at admin@woodzaa.com with “5 Steps” in the subject line. I’ll send you a free one‑page PDF cheat sheet of this guide – plus three printable patterns you can trace today.
And when you finish your first piece, send a photo. I’d love to celebrate with you.
– Sheila


Pingback: Start Whittling Today: Beginner-Friendly Wood Sculpture Ideas – 10 Projects You Can Make With a Pocket Knife - Woodzaa