

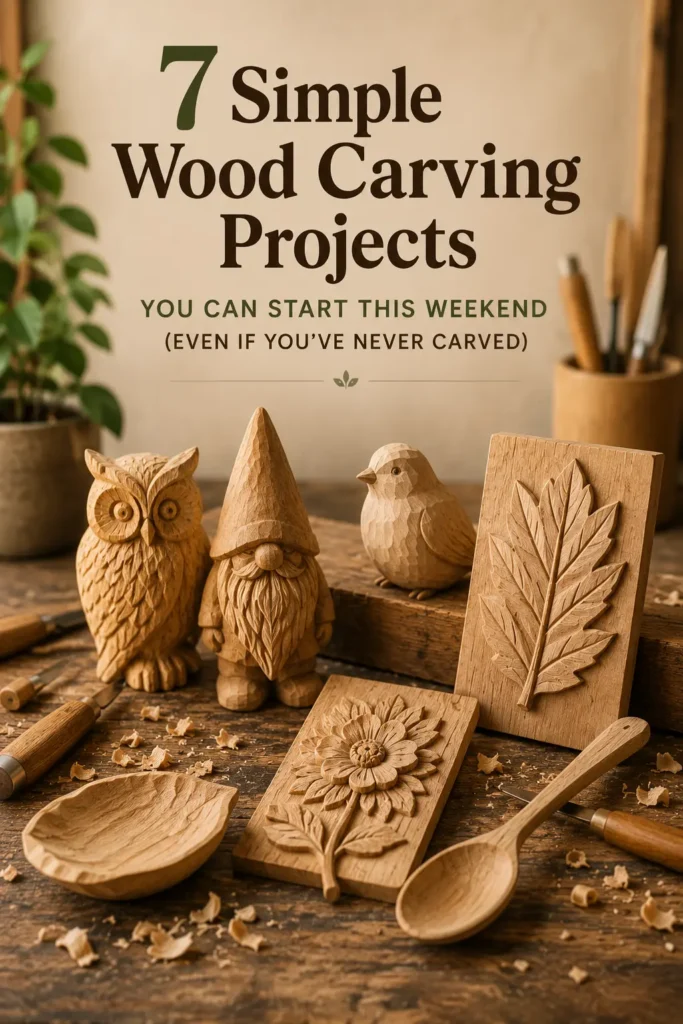
You’ve been scrolling through Pinterest, seeing beautiful hand‑carved wood pieces. You think, “I’d love to make something like that… but I don’t have weeks to learn.” Good news: you don’t. With the right project, you can go from a block of wood to a finished piece you’re proud of in just two days.
Let me show you simple wood carving projects you can start this weekend. Whether you’re a DIY furniture lover, a home stager looking for unique accents, or just someone who wants to make gifts by hand, these ideas are for you.
You’ll learn beginner wood carving projects that actually work, 2-day wood projects you can finish before Monday, how to start whittling a small animal, create a wooden garden gnome project, try relief carving for beginners, carve a wooden flower or leaf carving, and choose softwood carving ideas (basswood, pine) perfect for DIY weekend woodworkers.
Grab a knife, a block of wood, and let’s make some shavings.
1. Beginner Wood Carving Projects That Build Confidence
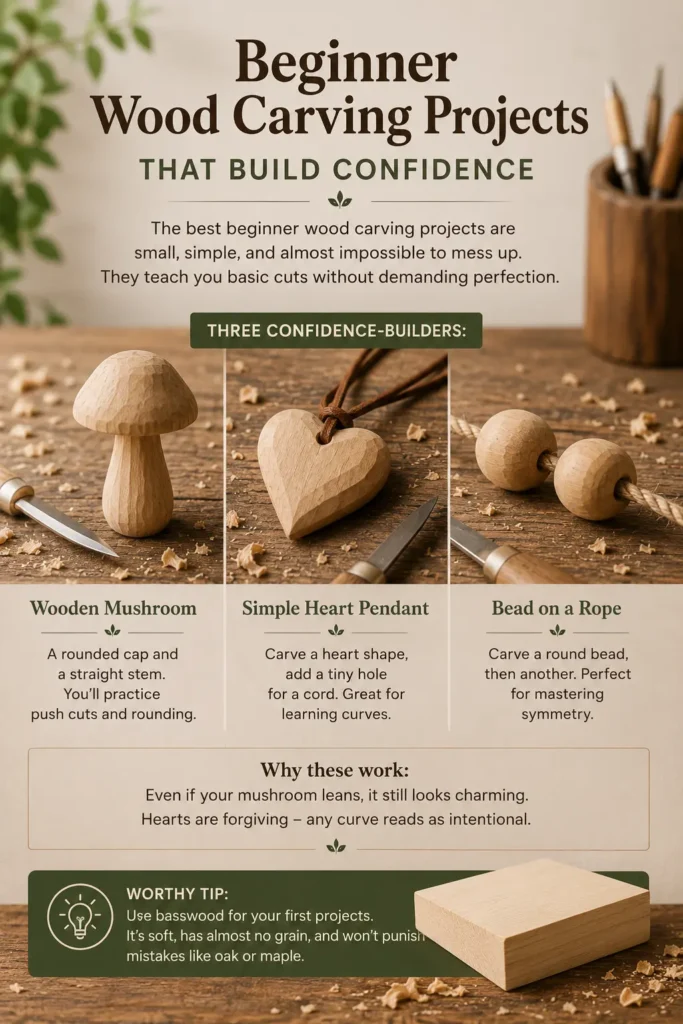
The best beginner wood carving projects are small, simple, and almost impossible to mess up. They teach you basic cuts without demanding perfection.
Three confidence‑builders:
- Wooden mushroom – A rounded cap and a straight stem. You’ll practice push cuts and rounding.
- Simple heart pendant – Carve a heart shape, add a tiny hole for a cord. Great for learning curves.
- Bead on a rope – Carve a round bead, then another. Perfect for mastering symmetry.
Why these work:
Even if your mushroom leans, it still looks charming. Hearts are forgiving – any curve reads as intentional.
Worthy tip: “Use basswood for your first projects. It’s soft, has almost no grain, and won’t punish mistakes like oak or maple.”
For more weekend inspiration, check out our related article: Simple Wood Carving Projects You Can Start This Weekend (Mid to High Net Worth)
2. 2-Day Wood Projects: What You Can Actually Finish
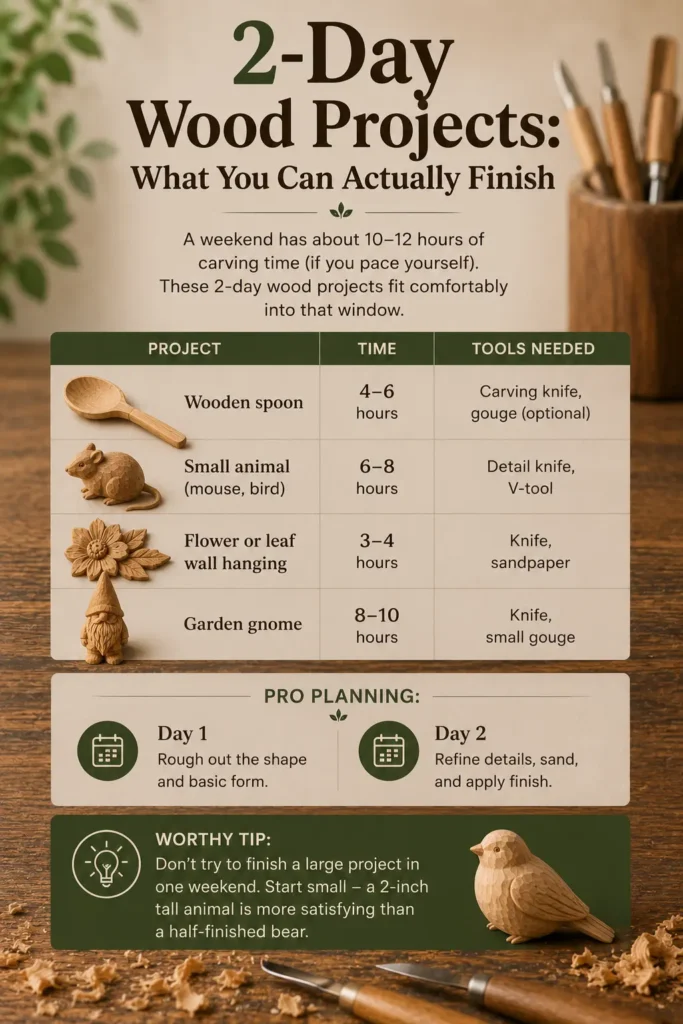
A weekend has about 10–12 hours of carving time (if you pace yourself). These 2-day wood projects fit comfortably into that window.
| Project | Time | Tools Needed |
|---|---|---|
| Wooden spoon | 4–6 hours | Carving knife, gouge (optional) |
| Small animal (mouse, bird) | 6–8 hours | Detail knife, V‑tool |
| Flower or leaf wall hanging | 3–4 hours | Knife, sandpaper |
| Garden gnome | 8–10 hours | Knife, small gouge |
Pro planning:
Day 1: Rough out the shape and basic form.
Day 2: Refine details, sand, and apply finish.
Worthy tip: “Don’t try to finish a large project in one weekend. Start small – a 2‑inch tall animal is more satisfying than a half‑finished bear.”
You Might Like : 15 Stunning Wooden Necklace and Ring Ideas That Bring Natural Beauty to Your Style
3. Whittling a Small Animal: The Classic Start
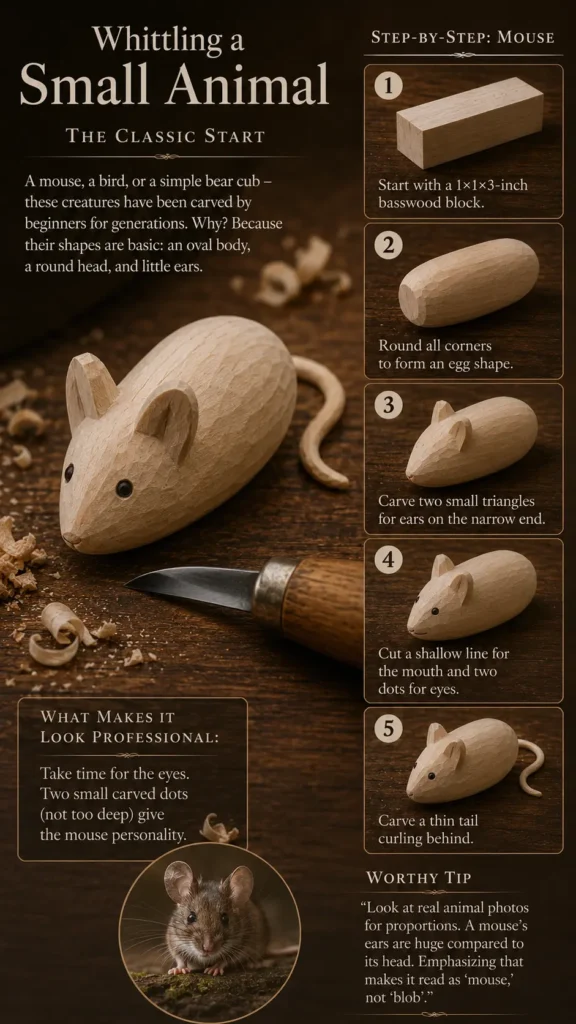
Whittling a small animal is a rite of passage. A mouse, a bird, or a simple bear cub – these creatures have been carved by beginners for generations. Why? Because their shapes are basic: an oval body, a round head, and little ears.
Step‑by‑step for a mouse:
- Start with a 1×1×3-inch basswood block.
- Round all corners to form an egg shape.
- Carve two small triangles for ears on the narrow end.
- Cut a shallow line for the mouth and two dots for eyes.
- Carve a thin tail curling behind.
What makes it look professional:
Take time for the eyes. Two small carved dots (not too deep) give the mouse personality.
Worthy tip: “Look at real animal photos for proportions. A mouse’s ears are huge compared to its head. Emphasizing that makes it read as ‘mouse,’ not ‘blob’.”
4. Wooden Garden Gnome Project: Whimsy for Outdoors
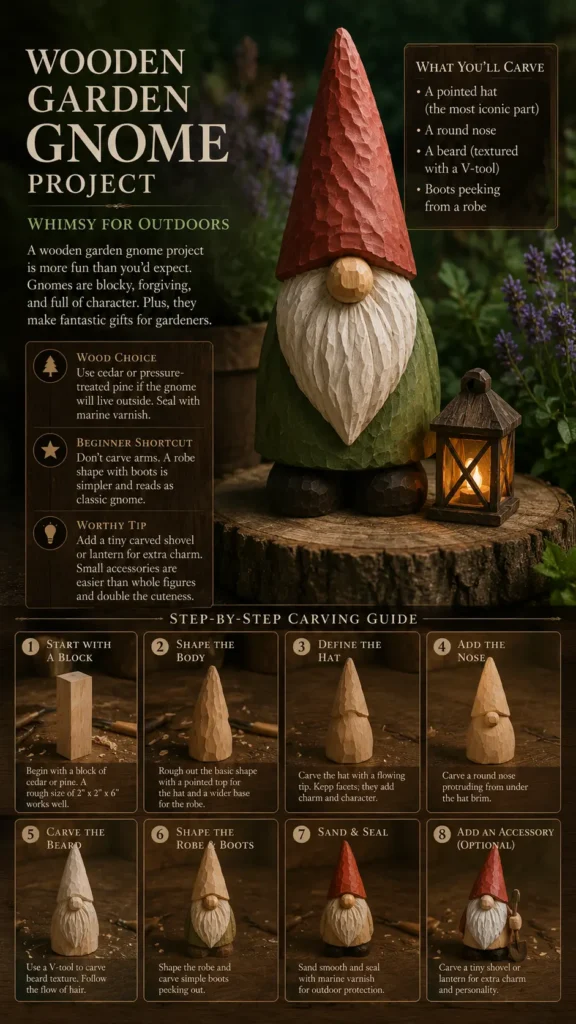
A wooden garden gnome project is more fun than you’d expect. Gnomes are blocky, forgiving, and full of character. Plus, they make fantastic gifts for gardeners.
What you’ll carve:
- A pointed hat (the most iconic part)
- A round nose
- A beard (textured with a V‑tool)
- Boots peeking from a robe
Wood choice:
Use cedar or pressure‑treated pine if the gnome will live outside. Seal with marine varnish.
Beginner shortcut:
Don’t carve arms. A robe shape with boots is simpler and reads as classic gnome.
Worthy tip: “Add a tiny carved shovel or lantern for extra charm. Small accessories are easier than whole figures and double the cuteness.”
5. Relief Carving for Beginners: Flat Panels with Depth
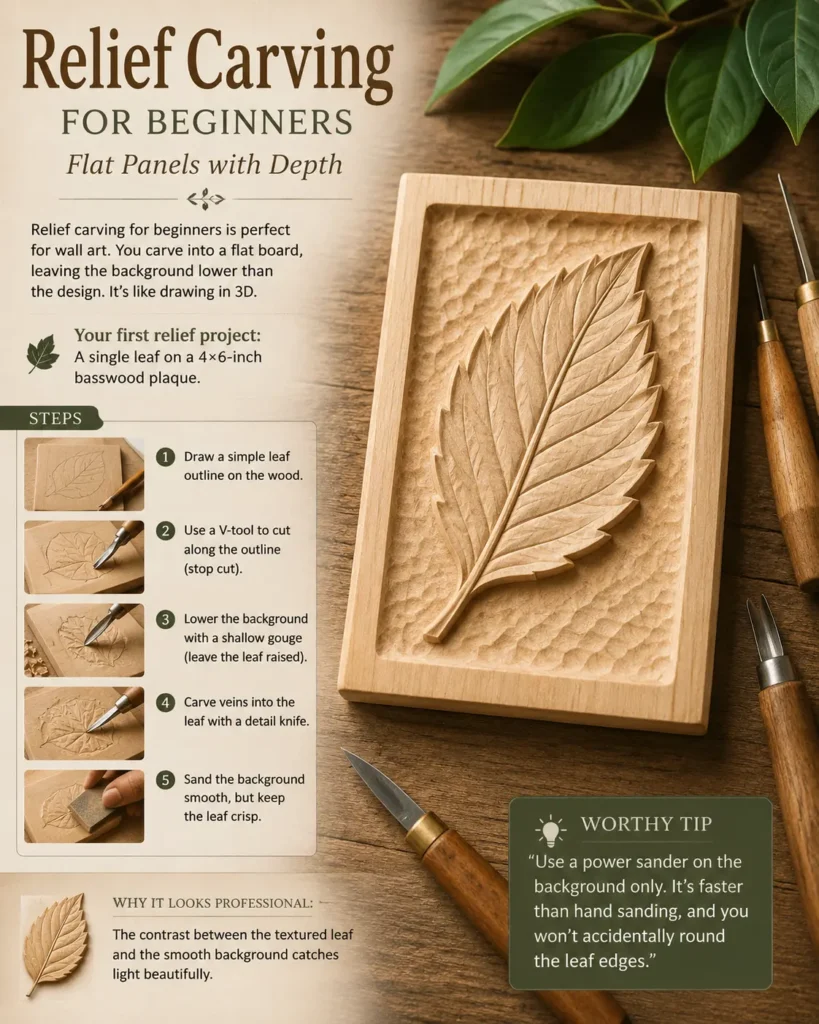
Relief carving for beginners is perfect for wall art. You carve into a flat board, leaving the background lower than the design. It’s like drawing in 3D.
Your first relief project:
A single leaf on a 4×6-inch basswood plaque.
Steps:
- Draw a simple leaf outline on the wood.
- Use a V‑tool to cut along the outline (stop cut).
- Lower the background with a shallow gouge (leave the leaf raised).
- Carve veins into the leaf with a detail knife.
- Sand the background smooth, but keep the leaf crisp.
Why it looks professional:
The contrast between the textured leaf and the smooth background catches light beautifully.
Worthy tip: “Use a power sander on the background only. It’s faster than hand sanding, and you won’t accidentally round the leaf edges.”
6. Wooden Flower or Leaf Carving: Nature’s Simple Beauty
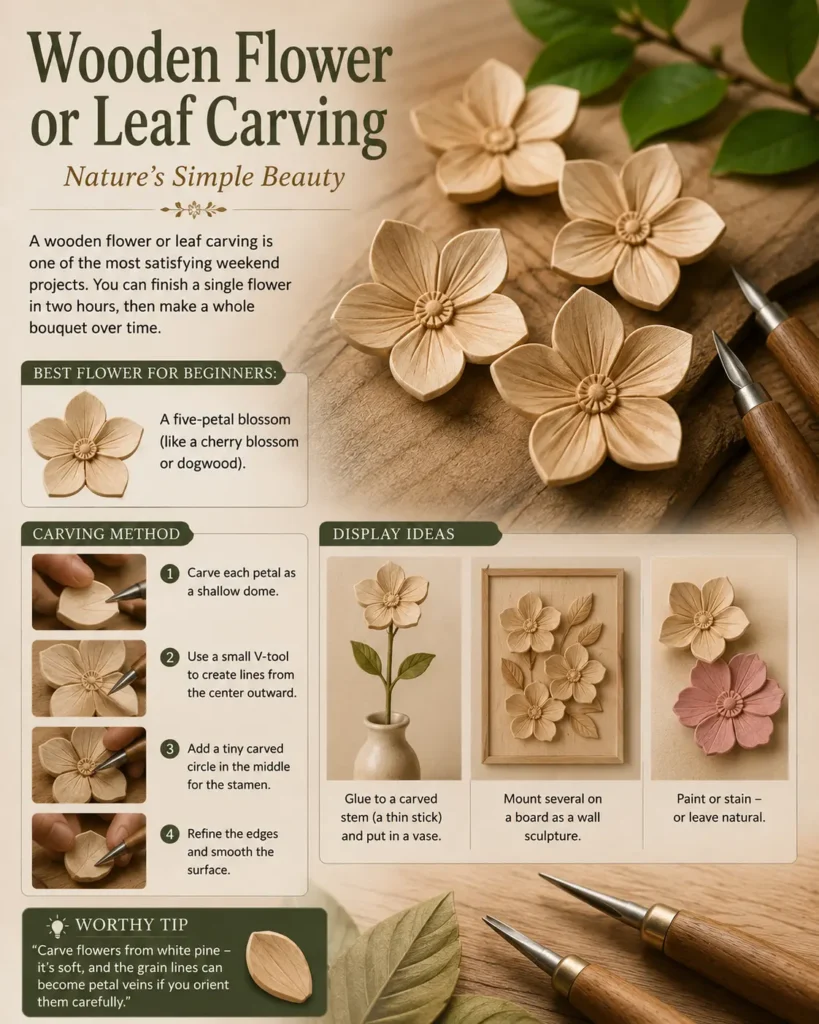
A wooden flower or leaf carving is one of the most satisfying weekend projects. You can finish a single flower in two hours, then make a whole bouquet over time.
Best flower for beginners:
A five‑petal blossom (like a cherry blossom or dogwood).
Carving method:
- Carve each petal as a shallow dome.
- Use a small V‑tool to create lines from the center outward.
- Add a tiny carved circle in the middle for the stamen.
Display ideas:
- Glue to a carved stem (a thin stick) and put in a vase.
- Mount several on a board as a wall sculpture.
- Paint or stain – or leave natural.
Worthy tip: “Carve flowers from white pine – it’s soft, and the grain lines can become petal veins if you orient them carefully.”
7. Softwood Carving Ideas (Basswood, Pine) for Weekend Warriors
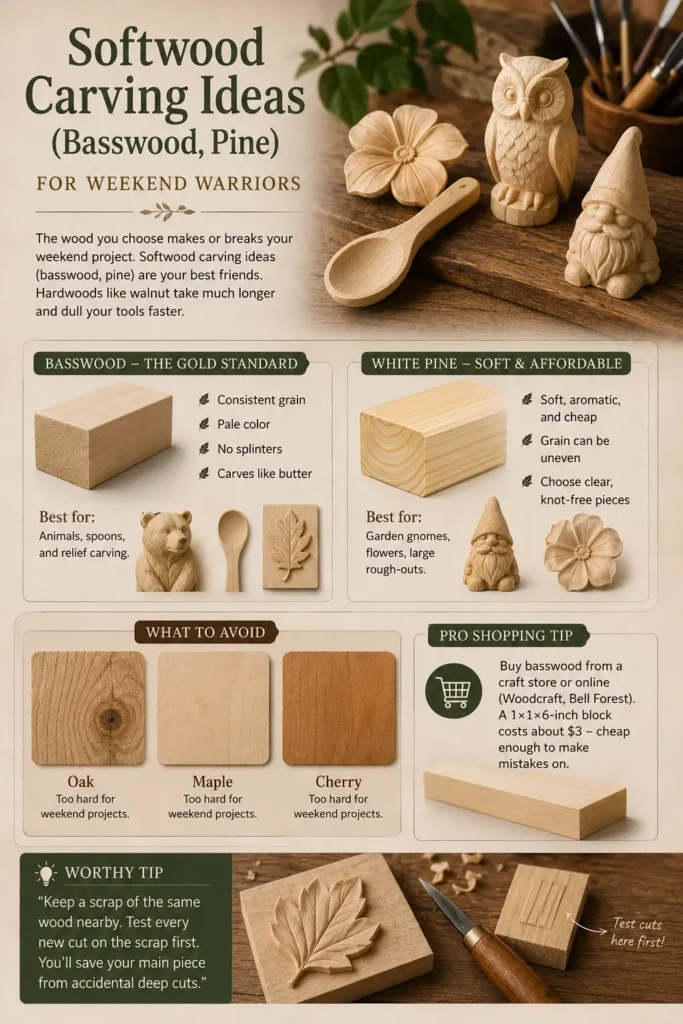
The wood you choose makes or breaks your weekend project. Softwood carving ideas (basswood, pine) are your best friends. Hardwoods like walnut take much longer and dull your tools faster.
Basswood – The gold standard. Consistent grain, pale color, no splinters. Carves like butter. Best for: animals, spoons, and relief carving.
White pine – Soft, aromatic, and cheap. Grain can be uneven, so choose clear, knot‑free pieces. Best for: garden gnomes, flowers, large rough‑outs.
What to avoid:
Oak, maple, cherry (too hard for weekend projects). Construction pine (too sappy, splits easily).
Pro shopping tip:
Buy basswood from a craft store or online (Woodcraft, Bell Forest). A 1×1×6-inch block costs about $3 – cheap enough to make mistakes on.
Worthy tip: “Keep a scrap of the same wood nearby. Test every new cut on the scrap first. You’ll save your main piece from accidental deep cuts.”
Bonus: Your Weekend Carving Kit
Before you start, gather these basics:
- Knife – A fixed‑blade carving knife (Morakniv 120 or similar)
- Glove – Cut‑resistant for your holding hand
- Strop – For keeping your knife sharp
- Sandpaper – 220, 400, and 600 grit
- Finish – Mineral oil or beeswax
That’s it. No power tools. No studio.
From Weekend to Wow
You now have simple wood carving projects you can start this weekend – from beginner wood carving projects and 2-day wood projects to whittling a small animal, a wooden garden gnome project, relief carving for beginners, a wooden flower or leaf carving, and softwood carving ideas (basswood, pine) perfect for DIY weekend woodworkers.
Pick one. Carve it. Sand it. Show it off. I promise you’ll be hooked.
Table of Contents
Call to Action (CTA)
Carved something this weekend? I’d love to see. Email a photo to admin@woodzaa.com with “My weekend carve” in the subject line. I’ll feature my favorites on my Pinterest page – and send you a free 10‑page guide to finishing wood sculptures.
Now go make some shavings.
– Sheila


Pingback: Beginner Wood Carving Art: From Zero to Stunning in 5 Steps – The Ultimate Guide for First‑Timers - Woodzaa