
Have you ever looked at a stunning wood sculpture and thought, “I wish I understood how that came to be”? Or maybe you’re an interior designer who wants to commission custom pieces but feels lost when artists talk about “blocking out” or “mallet work.”
You’re not alone. The process of turning a raw log into gallery‑worthy art can feel mysterious. But today, I’m pulling back the curtain. I’m going to show you how to create gorgeous wooden sculpture art from scratch – in plain, friendly language.
By the end of this guide, you’ll understand the entire journey: starting a wood sculpture from raw wood, safe mounting of finished sculpture, mallet types for sculpting, visualizing 3D form from a block, and blocking out geometric forms. Whether you want to carve yourself or commission with confidence, you’ll speak the language of sculptors.
Ready? Let’s start with the very first step.
1. Starting a Wood Sculpture from Raw Wood: Choosing Your Canvas
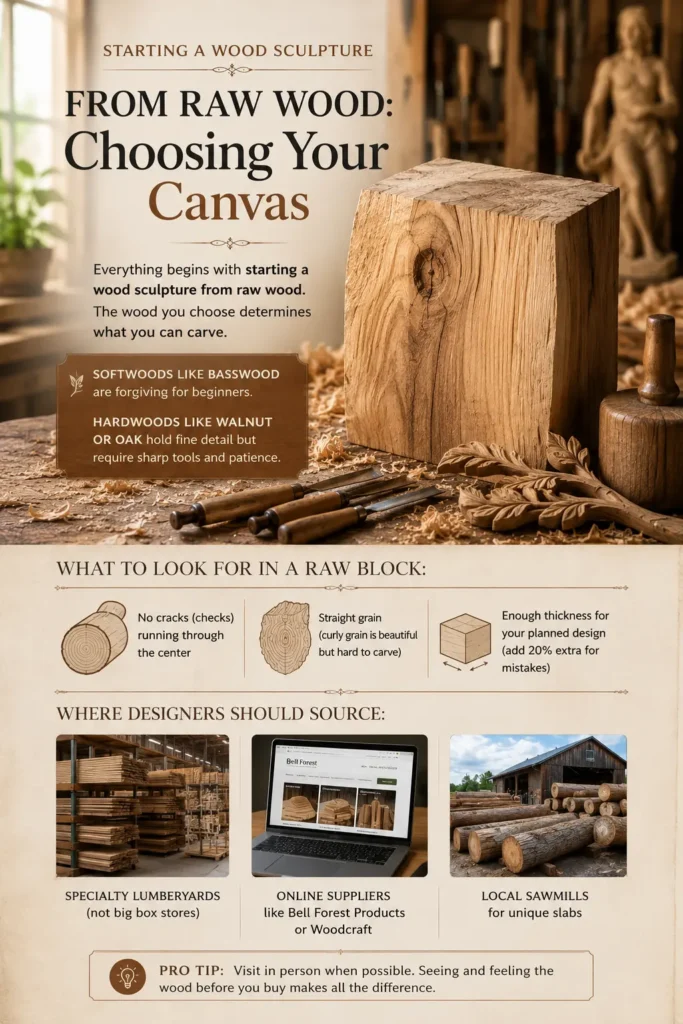
Everything begins with starting a wood sculpture from raw wood. The wood you choose determines what you can carve. Softwoods like basswood are forgiving for beginners. Hardwoods like walnut or oak hold fine detail but require sharp tools and patience.
What to look for in a raw block:
- No cracks (checks) running through the center
- Straight grain (curly grain is beautiful but hard to carve)
- Enough thickness for your planned design (add 20% extra for mistakes)
Where designers should source:
- Specialty lumberyards (not big box stores)
- Online suppliers like Bell Forest Products or Woodcraft
- Local sawmills for unique slabs
worthy tip: “Ask your sculptor for a small sample of the raw wood before they start. The color and grain in the rough will look completely different after finishing – know what you’re getting.”
For a deeper dive into sculptural techniques, check out our related article: How to Create Gorgeous Wooden Sculpture Art from Scratch (Mid to High Net Worth)
2. Visualizing 3D Form from a Block: Seeing What Isn’t There Yet
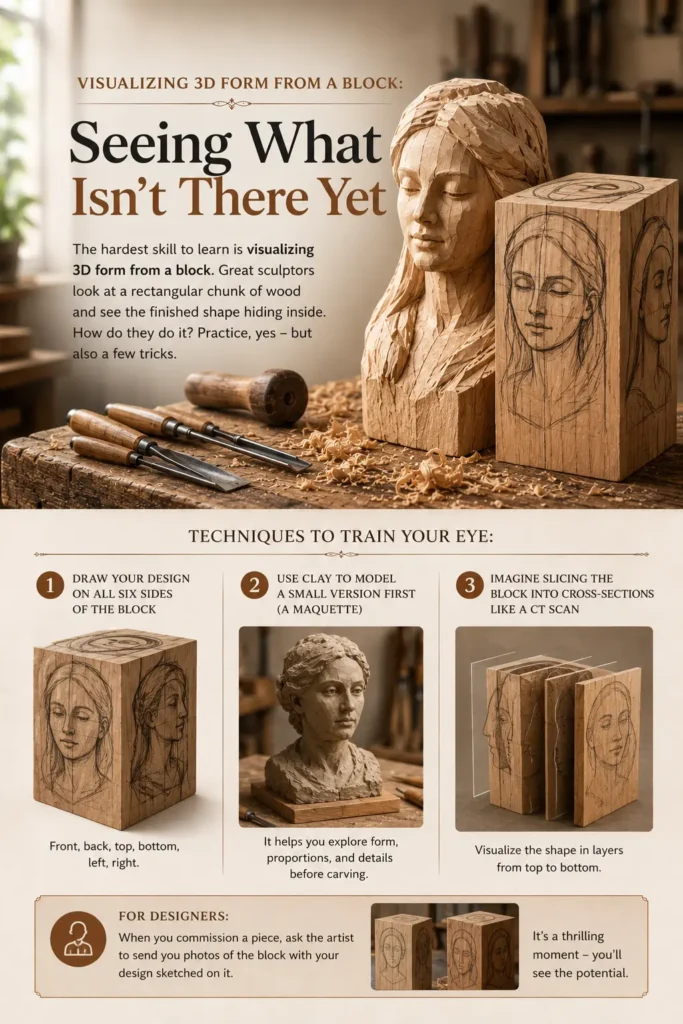
The hardest skill to learn is visualizing 3D form from a block. Great sculptors look at a rectangular chunk of wood and see the finished shape hiding inside. How do they do it? Practice, yes – but also a few tricks.
Techniques to train your eye:
- Draw your design on all six sides of the block (front, back, top, bottom, left, right)
- Use clay to model a small version first (a maquette)
- Imagine slicing the block into cross‑sections like a CT scan
For designers: When you commission a piece, ask the artist to send you photos of the block with your design sketched on it. It’s a thrilling moment – you’ll see the potential.
worthy tip: “If you’re carving yourself, start with a block that’s longer and wider than you need. You can always remove wood. You can’t add it back.”
You Might Like : DIY Wood Carving for Beginners: Your First Step into Sculpting Wood
3. Blocking Out Geometric Forms: From Cube to Creature
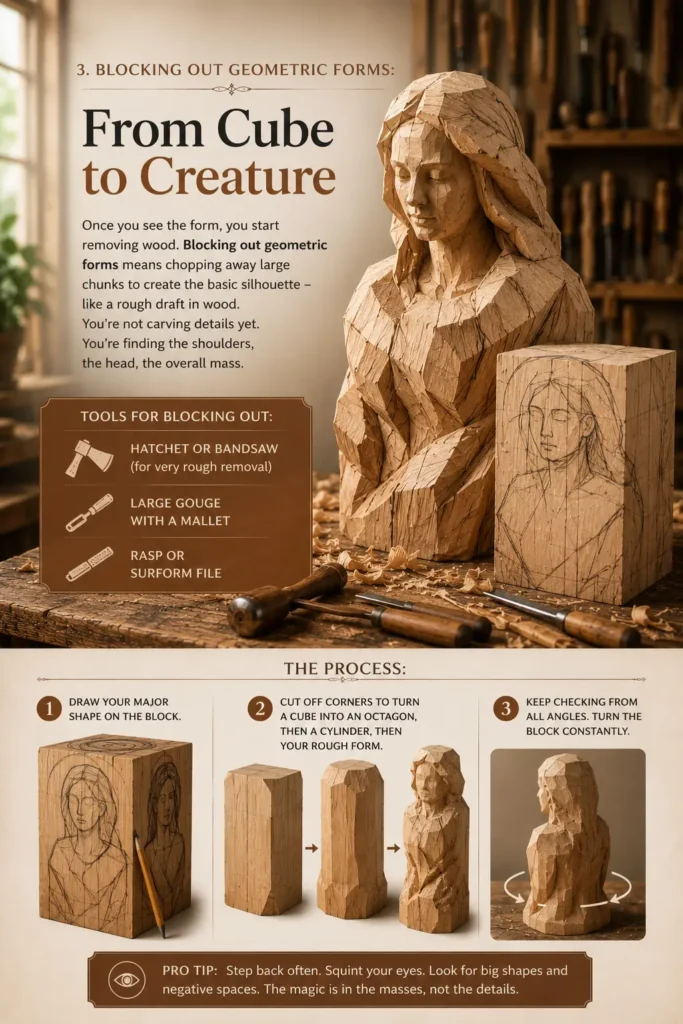
Once you see the form, you start removing wood. Blocking out geometric forms means chopping away large chunks to create the basic silhouette – like a rough draft in wood. You’re not carving details yet. You’re finding the shoulders, the head, the overall mass.
Tools for blocking out:
- Hatchet or bandsaw (for very rough removal)
- Large gouge with a mallet
- Rasp or surform file
The process:
- Draw your major shape on the block.
- Cut off corners to turn a cube into an octagon, then a cylinder, then your rough form.
- Keep checking from all angles. Turn the block constantly.
worthy tip: “Never try to block out a complex shape in one go. Work in stages: cube → rough animal → refined animal → details. Each stage takes the same amount of time.”
4. Mallet Types for Sculpting: Which One to Use (and Why)
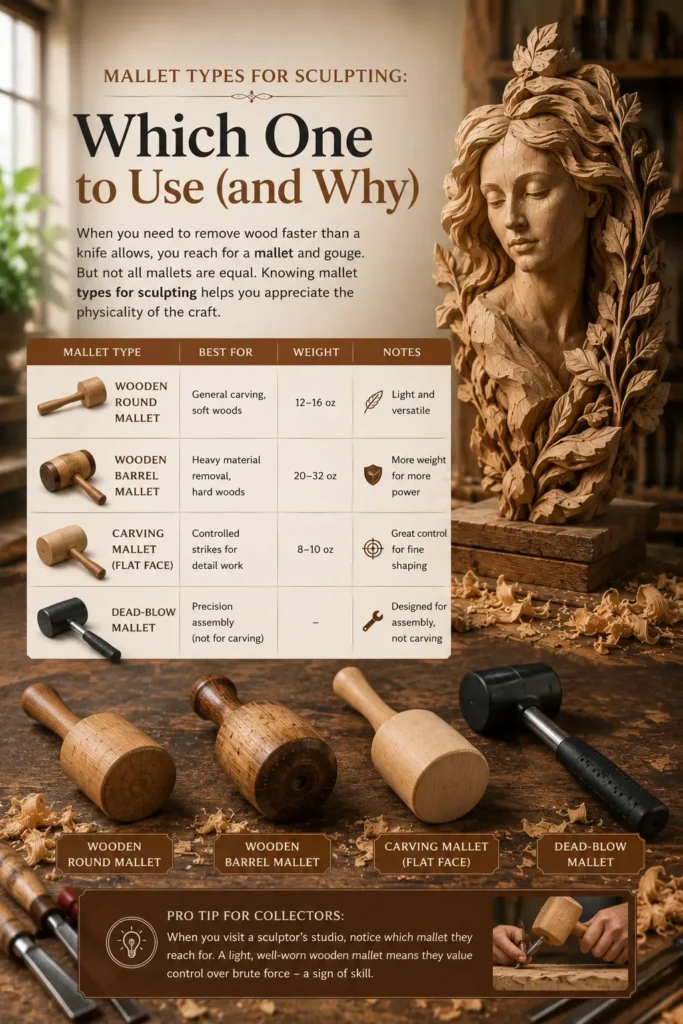
When you need to remove wood faster than a knife allows, you reach for a mallet and gouge. But not all mallets are equal. Knowing mallet types for sculpting helps you appreciate the physicality of the craft.
| Mallet Type | Best For | Weight |
|---|---|---|
| Wooden round mallet | General carving, soft woods | 12–16 oz |
| Wooden barrel mallet | Heavy material removal, hard woods | 20–32 oz |
| Carving mallet (flat face) | Controlled strikes for detail work | 8–10 oz |
| Dead‑blow mallet | Precision assembly (not for carving) | – |
Pro tip for collectors: When you visit a sculptor’s studio, notice which mallet they reach for. A light, well‑worn wooden mallet means they value control over brute force – a sign of skill.
worthy tip: “Never use a metal hammer on a wood chisel. The shock can split the handle or chip the tool. Wood on wood, always.”
5. Shaping, Texturing, and Refining: From Block to Beauty
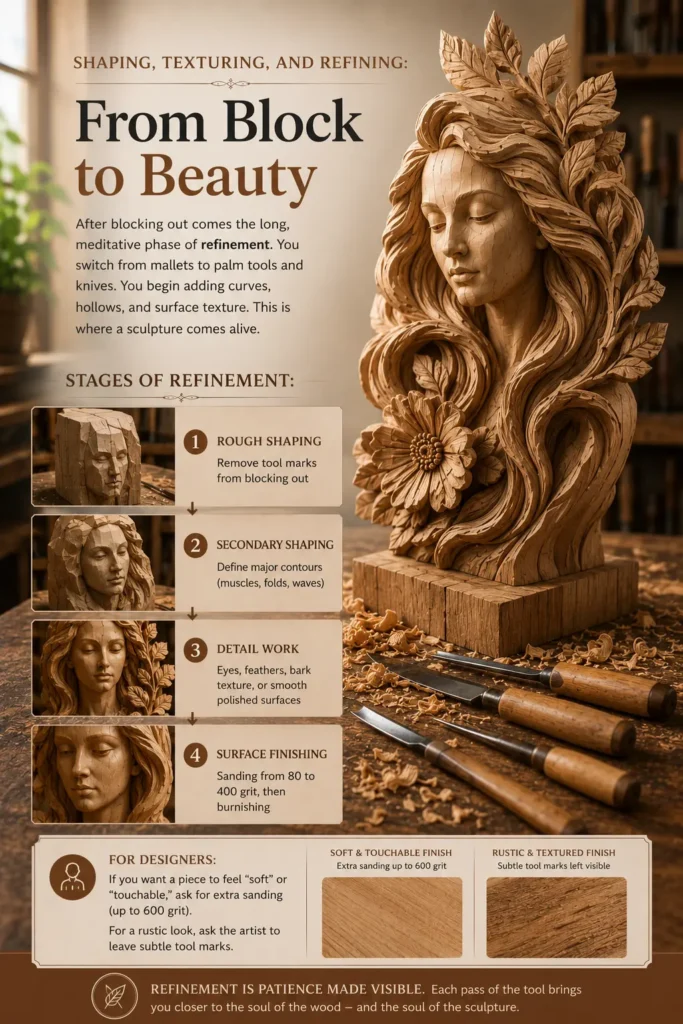
After blocking out comes the long, meditative phase of refinement. You switch from mallets to palm tools and knives. You begin adding curves, hollows, and surface texture. This is where a sculpture comes alive.
Stages of refinement:
- Rough shaping – Remove tool marks from blocking out
- Secondary shaping – Define major contours (muscles, folds, waves)
- Detail work – Eyes, feathers, bark texture, or smooth polished surfaces
- Surface finishing – Sanding from 80 to 400 grit, then burnishing
For designers: If you want a piece to feel “soft” or “touchable,” ask for extra sanding (up to 600 grit). For a rustic look, ask the artist to leave subtle tool marks.
worthy tip: “Run your hand over a finished sculpture. If you feel a rough spot, the artist will feel it too – and probably fix it before delivery. Don’t be shy to mention it.”
6. Safe Mounting of Finished Sculpture: Hanging Without Heartbreak

You’ve invested in a beautiful piece. Now, safe mounting of finished sculpture is critical. A falling sculpture can damage floors, injure someone, or shatter into irreparable pieces.
Mounting options:
- French cleats – Best for heavy wall sculptures (150 lbs+)
- Keyhole brackets – For medium pieces, flush to the wall
- Pedestal mounts – For floor sculptures, use museum wax or earthquake gel
- Hidden wire systems – For lighter pieces, but not recommended for valuable art
Pro installer tips:
- Always mount into studs or use heavy‑duty drywall anchors (toggle bolts)
- For outdoor sculptures, use stainless steel hardware and seal the mounting holes
- For rented spaces, consider a floor stand or tension‑mounted pole system
worthy tip: “Ask the sculptor to pre‑drill mounting holes and include the hardware. It’s a small fee that saves you a trip to the hardware store – and a potential disaster.”
7. Finishing and Sealing: Protecting Your Masterpiece
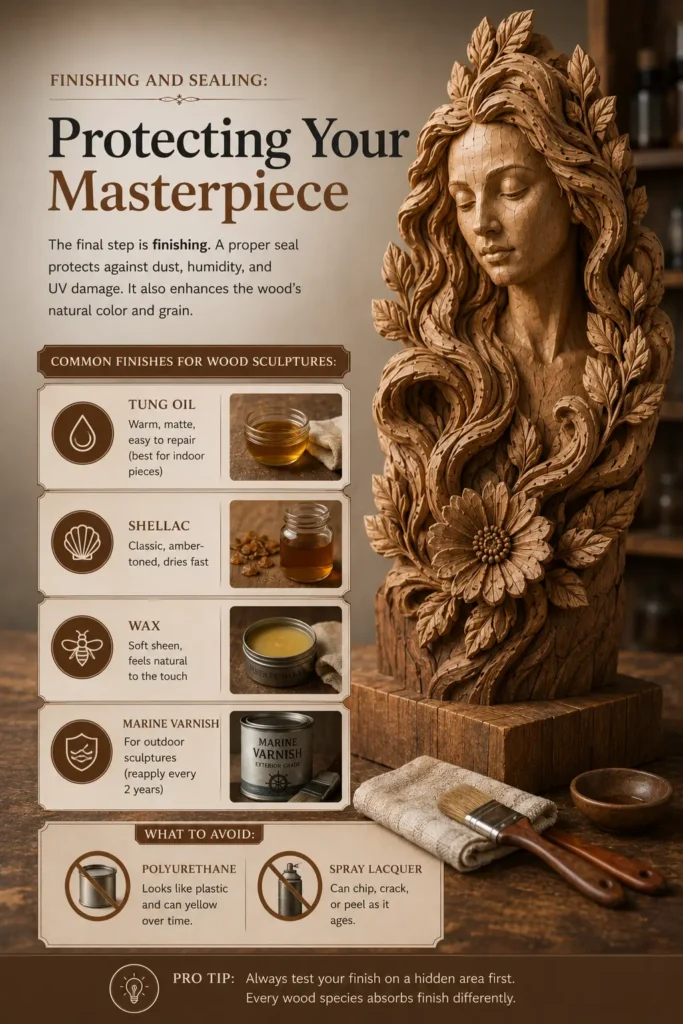
The final step is finishing. A proper seal protects against dust, humidity, and UV damage. It also enhances the wood’s natural color and grain.
Common finishes for wood sculptures:
- Tung oil – Warm, matte, easy to repair (best for indoor pieces)
- Shellac – Classic, amber‑toned, dries fast
- Wax – Soft sheen, feels natural to the touch
- Marine varnish – For outdoor sculptures (reapply every 2 years)
What to avoid:
Polyurethane (looks like plastic) and spray lacquer (can chip over time).
worthy tip: “For a piece that will be touched often (a tabletop sculpture or stair newel), choose wax or tung oil. If a scratch happens, you can buff it out without refinishing the whole piece.”
From Raw Wood to Ravishing Art
You now understand how to create gorgeous wooden sculpture art from scratch – from starting a wood sculpture from raw wood to safe mounting of finished sculpture, plus mallet types, visualizing 3D form, and blocking out geometric forms.
Whether you’re planning to commission a piece or try carving yourself, you have the knowledge to ask smart questions, appreciate the craft, and protect your investment.
Table of Contents
Call to Action (CTA)
I’d love to hear from you. Are you working on a project that needs a custom wood sculpture? Or are you inspired to pick up a mallet and try blocking out your own form?
Email me at admin@woodzaa.com with your questions, your space photos, or even a rough sketch. I’ll reply with honest advice – no hard sell, just a fellow wood lover helping out.
Let’s turn your vision into wood.
– Sheila


Pingback: 10 Unique Wood Sculptures That Double as Statement Decor (And Wow Every Guest) - Woodzaa